|
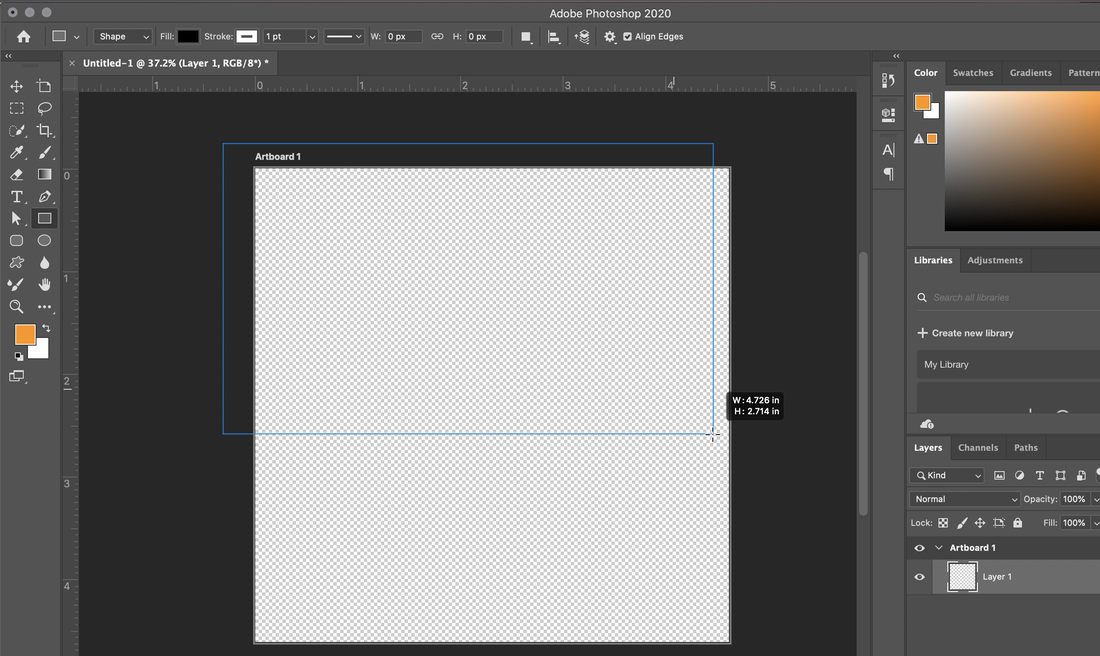
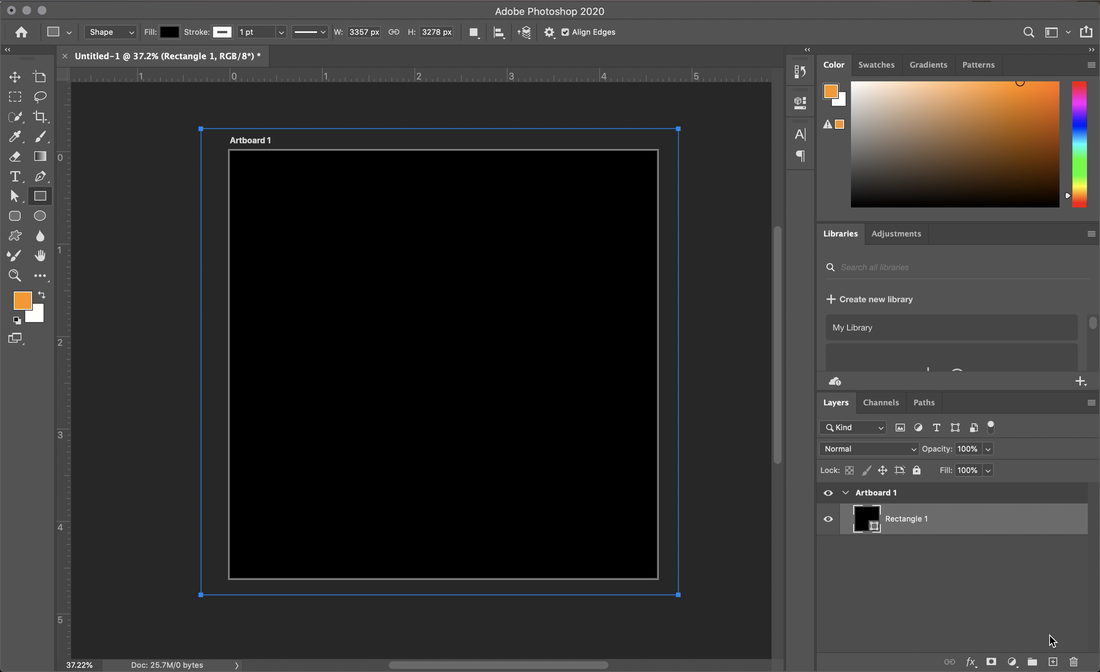
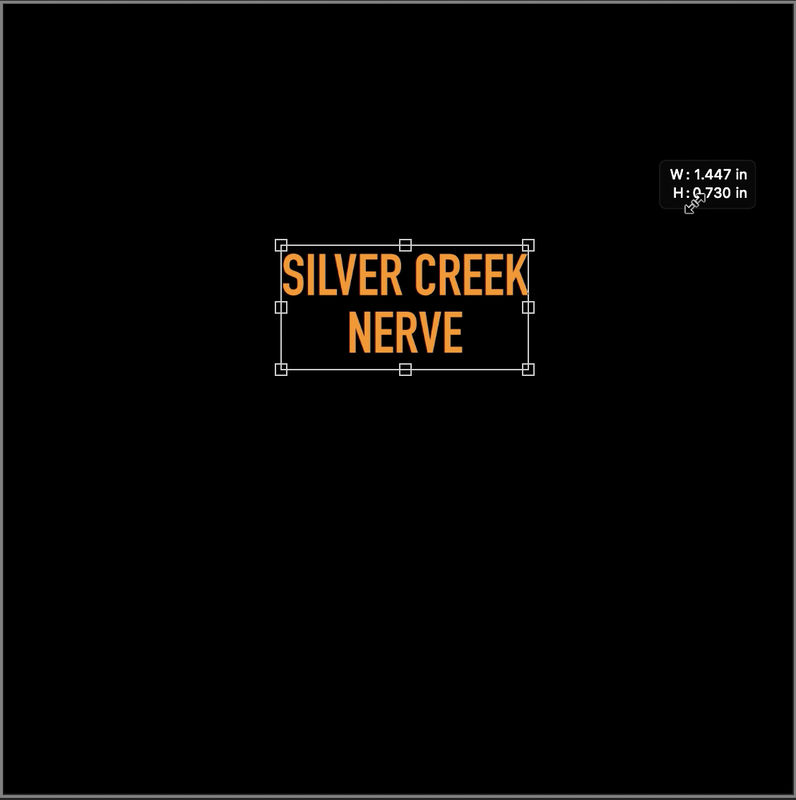
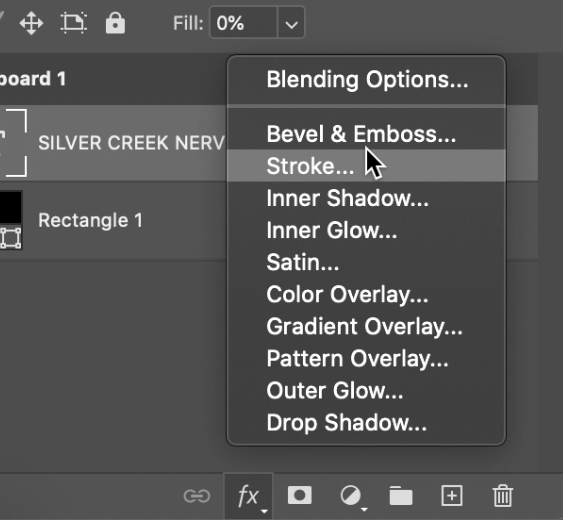
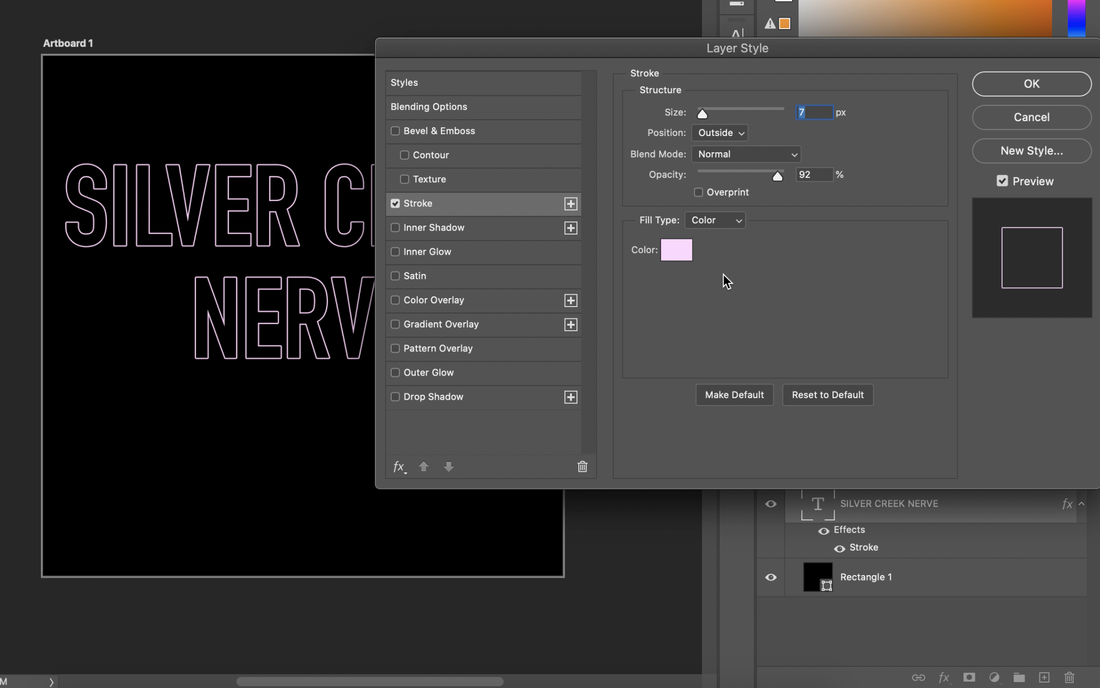
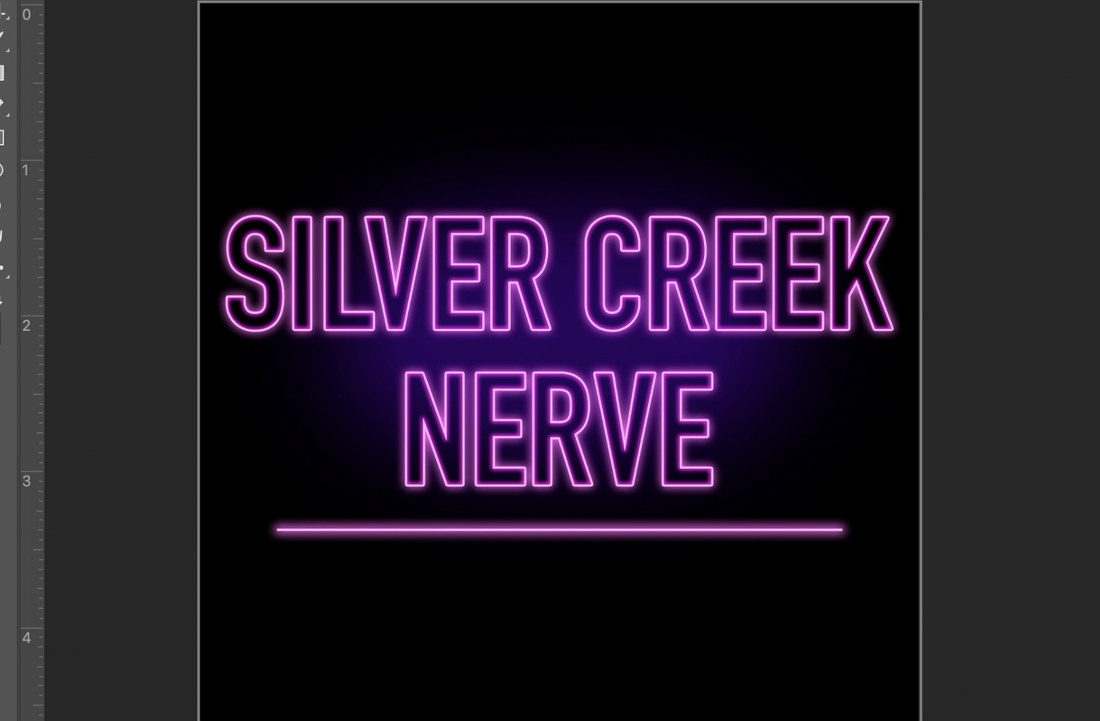
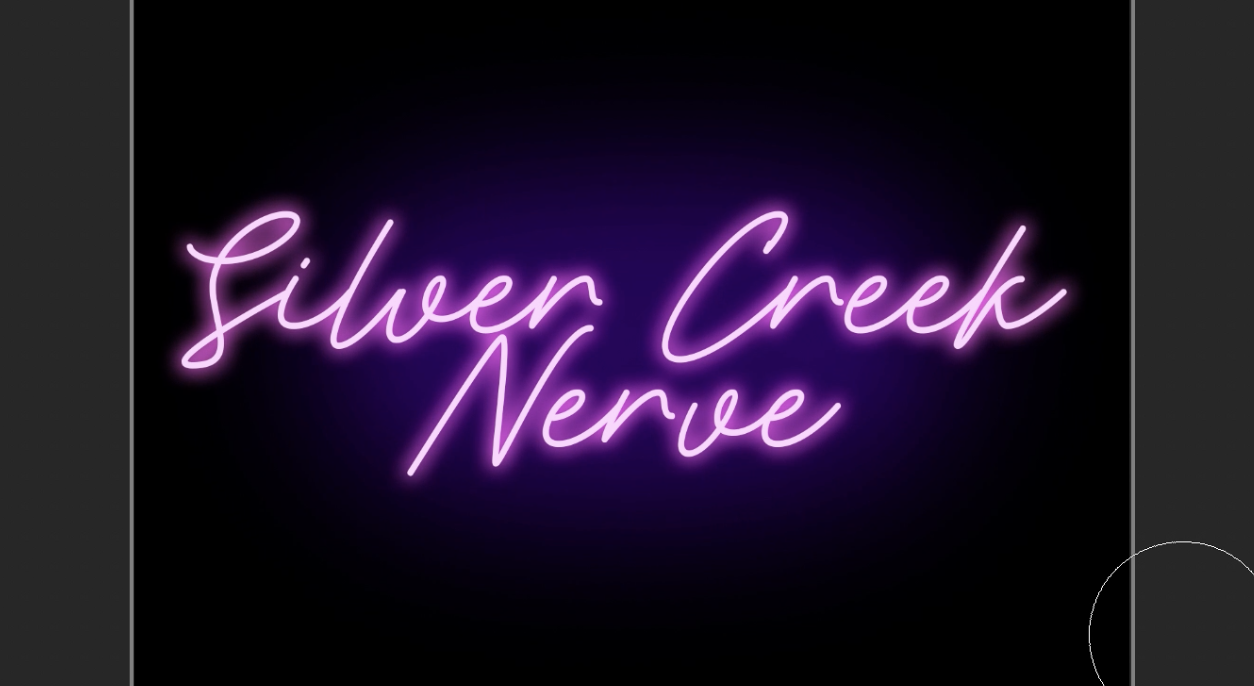
Written by: Heidi Shin (Head Publicity Commissioner) 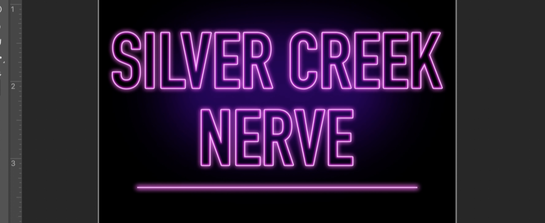 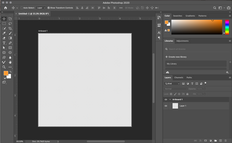 In honor of our SCHS Nerve coming up, we will be showing how to achieve the glow in the dark, neon effect on font! This tutorial will show how to create this effect through photoshop, however, many other design programs can be used. Click here for a list of programs you can use instead of Photoshop: Glow in the dark Neon Text: 1. Starting off, this is a simple square (3000 x 3000 px @650 ppi) with a transparent background 2. We will then make a black rectangle as the background using the Rectangle Tool and Resize tool to fit the page. 3. Use the Text tool to write out the text and the use Resize tool to enlarge. 4. Using the opacity and fill in the bottom right hand corner above layers, make fill to 0%. Opacity is the extent to which the image or color blocks light while Fill is the cover of space with an image or color. 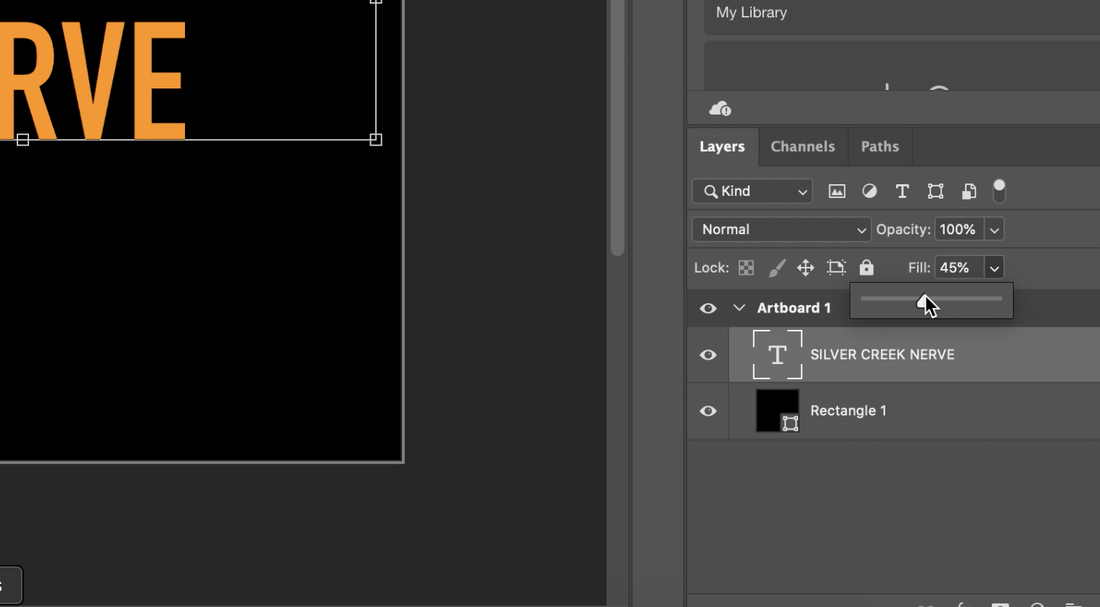 5. In the bottom right corner, go to effects (fx), and choose stroke. Stroke is a colored border or outline around a selection or layer. In this example, we are creating a neon pink glow, so set the outline color to a light shade of pink. 6. Then, choose Outer Glow and choose a bright neon color. In this example, we would choose a bright magenta and use the spread, size, and opacity settings to modify it. Then use Inner Glow, glow inside the text, and choose the same color with a smaller spread/size. The best way of achieving the most realistic glow is playing with the settings and opacities. 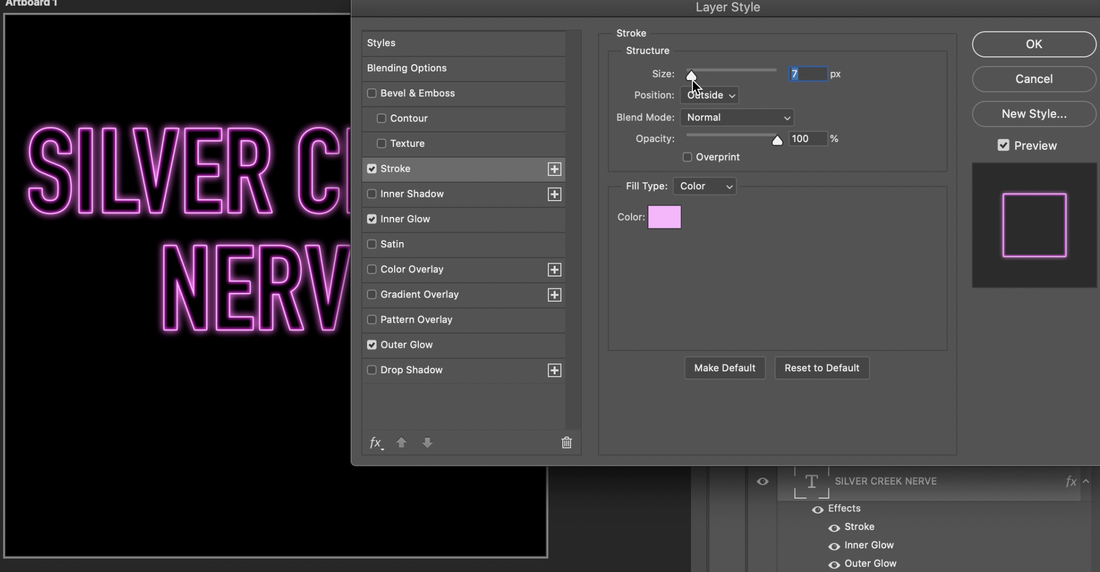 7. For added glow, use blurred Paint Tool in a dark purple color and add behind the text. Turn down the opacity and adjust for the final look! You can do this same process with fonts that are filled or are made of solid lines.
1 Comment
|
AuthorPublicity Archives
December 2020
Categories |

 RSS Feed
